Showing posts with label Mom Crafts. Show all posts

Monday, September 15, 2014

School Shelving

Organize it up right!

I have had mangled mismatched shelving with the homeschool books for a while now.  Things in all different closets or places.  I had this vision to utilize a wall in our schooling area.  First I was going to build the shelving into the wall.  Well we haven't technically finished that part of the basement yet, so that would be a pain to worry about later.  So instead I decided to make three shelves to cover most of the wall space but giving me flexibility to move them out or around easier if need be.

I figured my size, and how much wood I would need.  Went to Lowe's and asked them to cut all pieces I need.  They do this for free by the way.  So I waited a little while.  And went home with all my perfectly cut pieces of wood, and some screws.  Now just a little work on my part to screw them together and wha-la!  A beautiful shelving unit which puts all my books in one place.  Doesn't it feel great to get that all put together? :)


You can do it too!


Friday, September 12, 2014

Measure UP!

When I was growing up my mom marked how tall we were throughout the years.  It was a fun thing to do.  However, now that the time is here where she is planning to move out of my childhood home, how is she going to preserve all those measurements that we wrote on the door jam between the kitchen and the dining room.


Well, I decided to measure up my kids in a more 'move friendly' manner.

Check it out!

Get a 1x4x8 board at your local store.
Measure out your markings with a pen, or marker.  Start measure your children on this board.

Mine fit perfectly in the hallway by the bedroom or bathroom door.  The ceiling is 8 feet tall so I didn't even have to screw it in to the wall.  Now we will always be able to bring this piece with us if we ever need to move.

Enjoy!


Wednesday, February 8, 2012

Craft-Gift Idea

A homemade gift idea.


First I bought a 4"x6' board from Fleet Farm.  Then I painted the front and sides black.


After it dried I added to eye screws to the sides.  Then attached a ribbon from one to the other.  White or black.


Then I attached picture hanging brackets to the back so they can hang it.


Last, I used my photography letters, and spelled my last name.  Matting the pictures, each to a white piece of cardstock for extra looks. Attach the letters in order, of course, with little clips.  I chose little clips that look like miniature clothes pins found in the craft section of most stores.  Now you are ready to hang it up, or spell someone else's name and give it away as a great personalized gift!

WRIGHT

Want to make one for yourself?  Want to make one for your friend?
My letters are available for purchase.  Comment if you want to know more.

Happy Crafting!


Tuesday, November 30, 2010

Christmas Craft #4

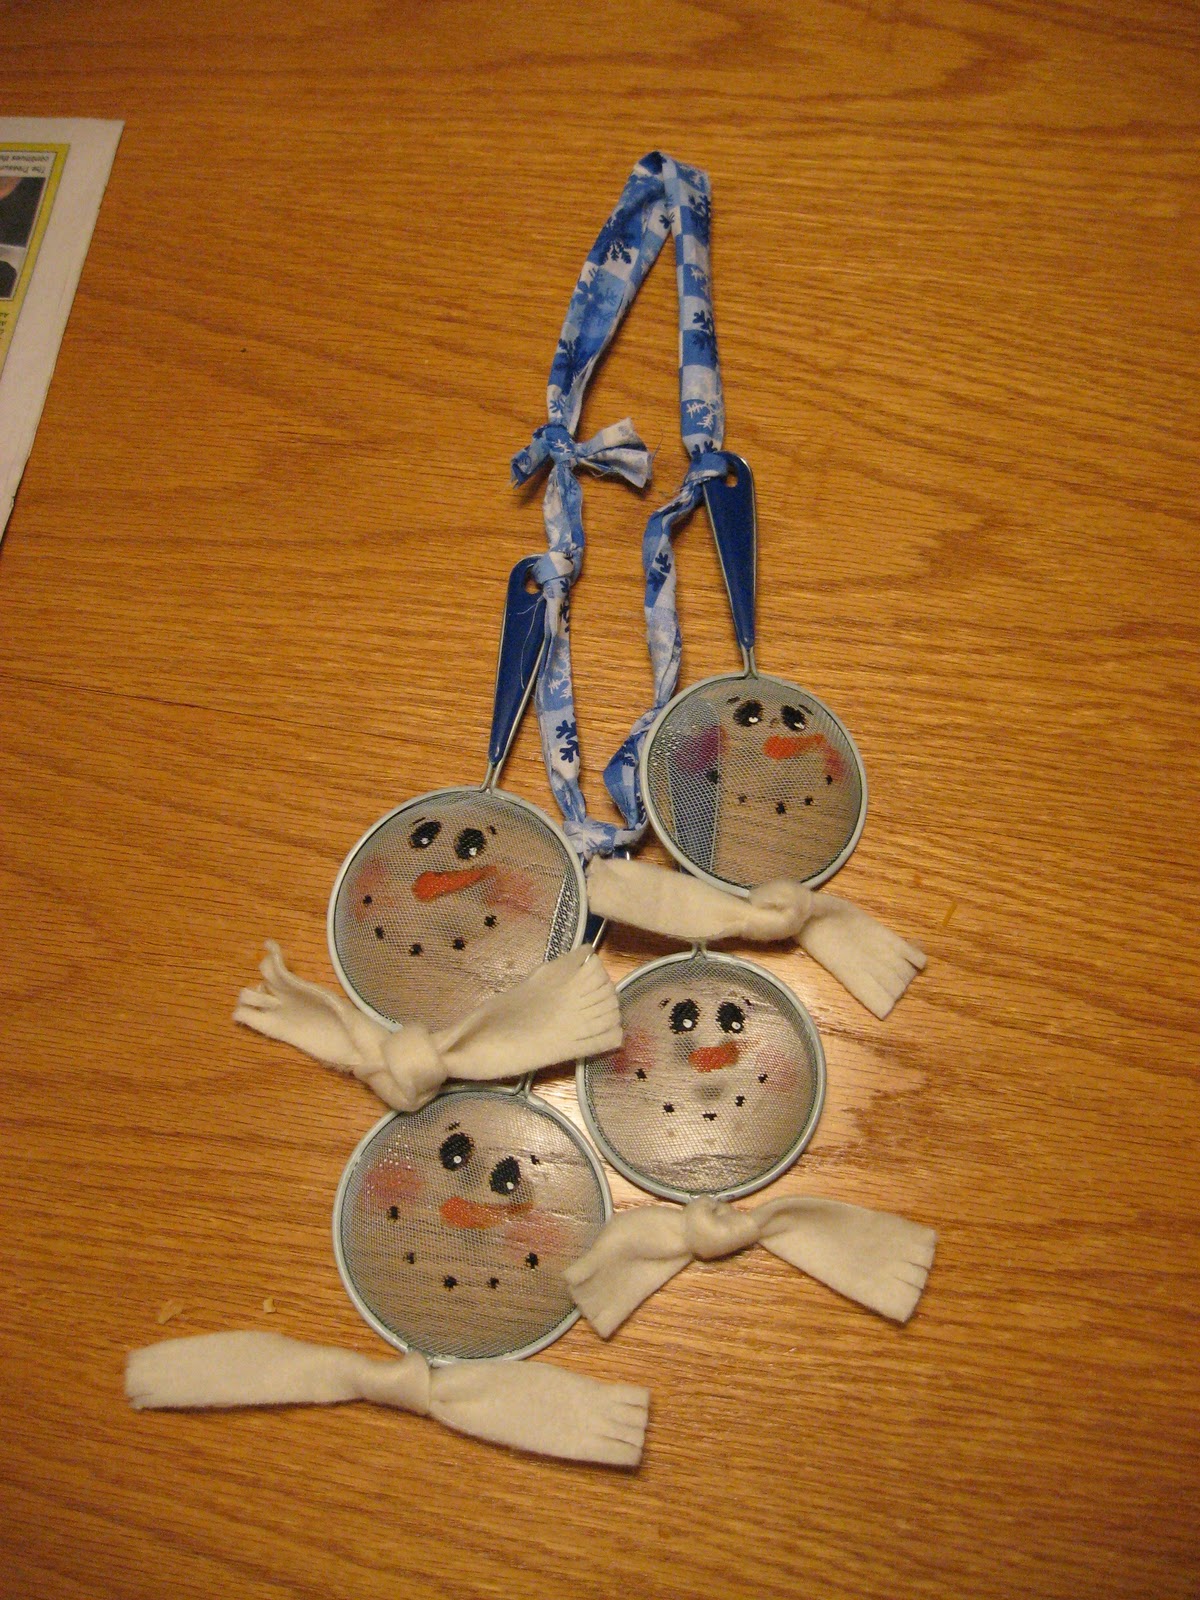
Ok...one more Christmas idea for now.  These are great homemade gift giving ideas too!

This is a very fine wired, small strainer.  If the holes are too big it won't hold the spray paint as well.
Spray painted white, and then once dry, I painted the snowman face on it.
Next I used ribbon or material to fancy it up a little bit and string them together.  
I gave them to people and strung them together based on how many people they had in their family.  
You could also just hang one, which was the original idea.


I guess I didn't take a picture this way, but I also added a little letter to each handle, so when it was hanging it says S-N-O-W.
Or if there were only 3 it said Let-It-Snow
And if there were 2 together it said LET it-SNOW 
Get it?

It was fun to do.  I think you might enjoy it! :)

Sunday, November 28, 2010

Christmas Craft #3

Here's another one.  
I like to make crafts at Christmas time to give to my friends.  
One year I did these.
I got the bowls at a craft show.  They were just the clay bowls waiting to be painted.
I made 2 versions.... a snowman watching it snow, and just a snowman head.


Snowmen are simple.  You can do it too! :)

Monday, November 22, 2010

Christmas Craft #2

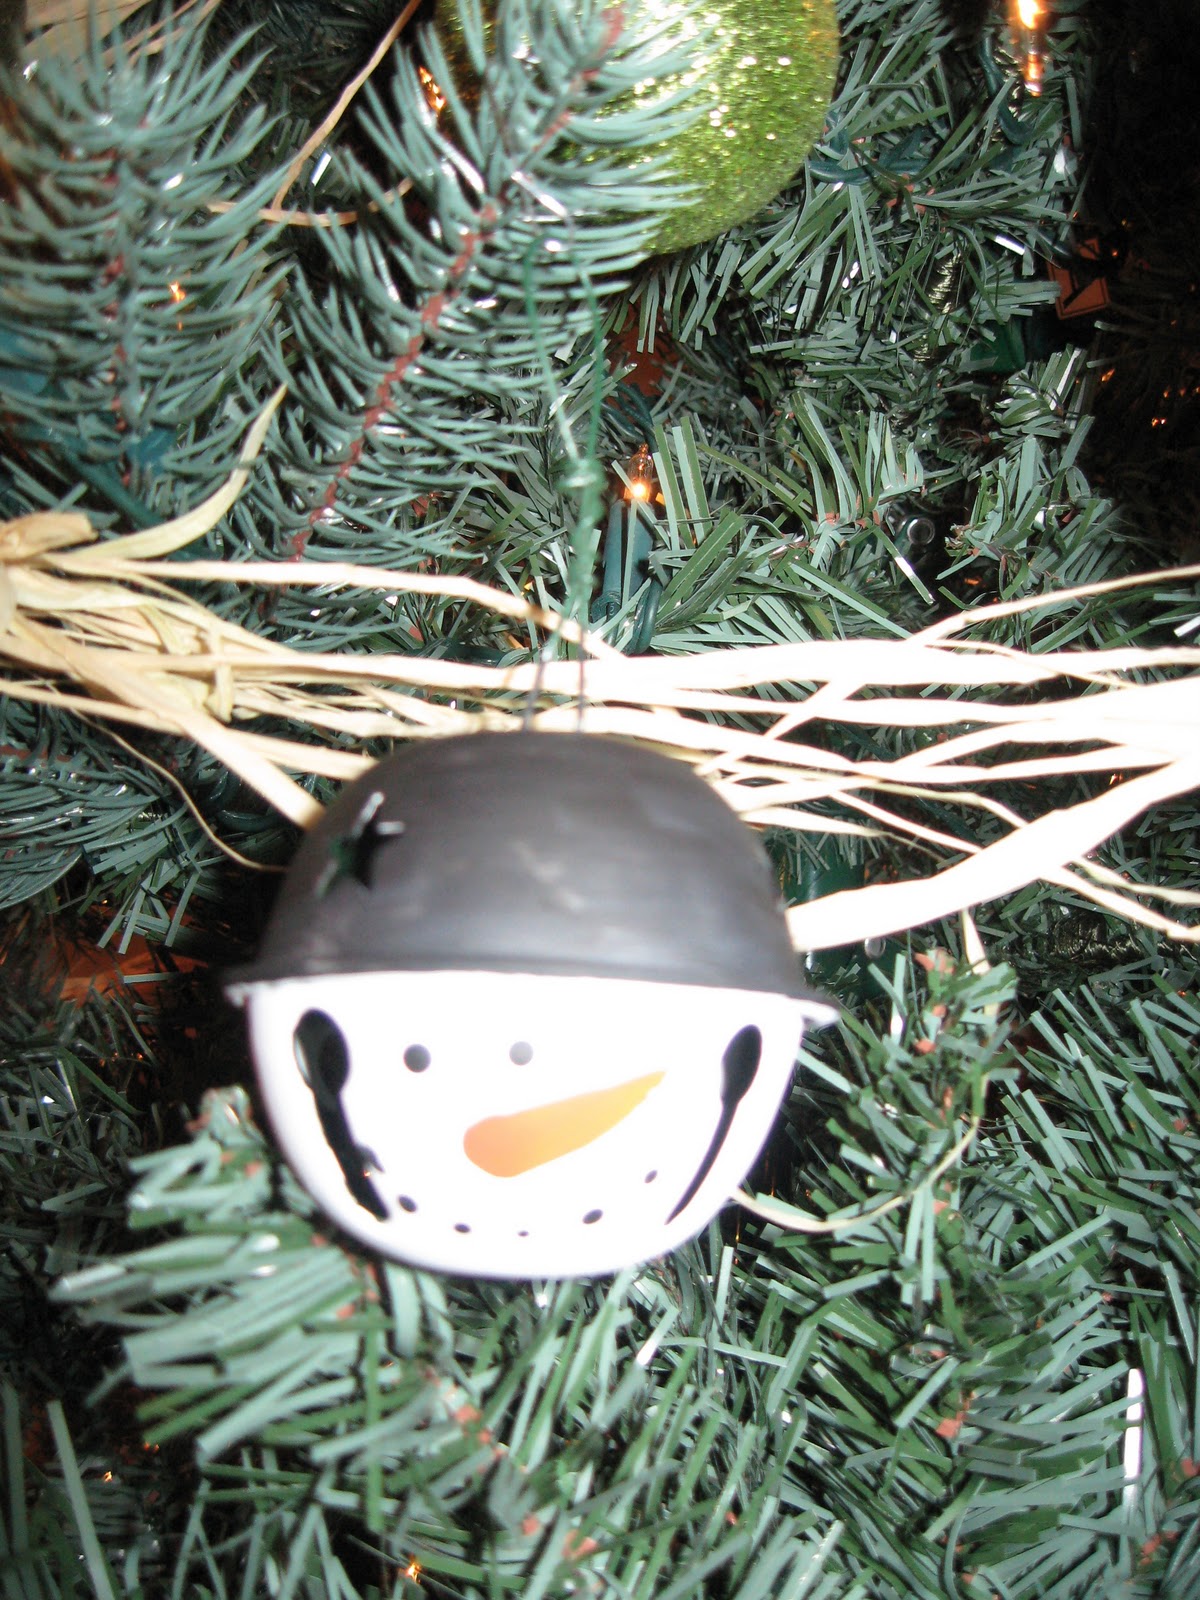
Here's another little Christmas ornament craft I made for my tree.
I picked up some ordinary bells on sale at Country Goods in town.  
(They have great stuff if you've never been, by the way!)

I bought them for the purpose of painting them like a snowman.
Here's the finished project.  It's super easy.  You can totally do this too!

Happy Crafting!


Is it your thing?  Do you like it?  Are you going to try it for yourself?

Sunday, November 21, 2010

Christmas Craft #1

I made this craft as ornaments for my Christmas tree awhile ago.   Thought I would share with you all.

They were really easy.  I bought a couple yards of fleece material, and some felt.  Cut out the shapes by hand, so they may not be precise.   But that gives them some charm. :)  I bought pillow stuffing and after sewing the design on the front.  Sewed 3 sides together, stuffed it like a little miniature pillow and then sewed the other side shut.


What do you think?  Is it simple enough for you to try it yourself?  Do you have a craft you've made as a part of your Christmas decorations?  Please share!

Wednesday, March 24, 2010

Easter craft decorations

I made these a few years ago. I get them out before Easter every year as part of my 4 Easter decorations. :) I should really get more Easter Decorations, but they don't usually sit out very long. So I'd feel wasteful if I had a bunch since they only sit out for approximately 2 weeks.


It’s a simple idea that anyone can do. I found the little pots, like a plant pot, and the wooden eggs at Michaels, or Hobby Lobby. Then painted them. I did 2 as chickens, and the others I did random designs. You should give it a try.


up close view of wooden egg and pot


up close view put together. Just a word of advice, store them separately. The first year I stored them together just wrapped them up and that is why there is a little bit of a line around the egg. The wood must have expanded a little and got stuck to the pot.

Thursday, February 18, 2010

Growth Charts

When I was growing up we measured how tall we got every once in a while. But we wrote it right on the wood of the doorway between the kitchen and dinning room. I always loved that. And still do! It's great to see the progress of growing and getting older/bigger. Luckily my mom still lives in the same house and we can still look back at it. I think if she ever moves she's going to have to rip that door frame out so she can keep the measurements. :) I kept thinking I'd really like to do that somewhere in my house. But I thought, odds are more likely that we won't live here as long as my mom has lived in her house. So I better make it a little easier to move around. I've seen big wood ones that you can buy, but again with Frugal or crafty Stephanie....I'm pretty sure I can make my own version much cheaper....and I'd rather have something a little easier to take with me if need be. So I decided to make one out of cardstock paper. A little more durable that just plain thin paper. I measured out every 1/4 inch and marked the feet and inches. Taped it all together and put it on the side of the pantry. When the boys get up from nap, I will measure them for the first time, and then hopefully remember to do it every 4 months or so. :) I'm sure they'll ask again tomorrow to be measured, as if they grew overnight! HA

An up close look. I only numbered the feet and inches...didn't quite feel like marking every 1/4". :)


Taped it to the side of the pantry.

You might also like these posts.

Related Posts Plugin for WordPress, Blogger...